

how to draw a flower step by step
Flowers undoubtedly bring a great amount of color and beauty to the earth. It's difficult to look at a beautiful, fragrant flower and not have a smile on your face up!
Whether used to brighten upward a room or as a gift to a lover, it's ever a welcome sight to run across a pretty blossom.
You may love flowers, simply if y'all've ever wondered how to depict a flower you're in the right place! Past the end of this guide, you will be drawing flowers with ease.
This fun and simple stride-by-pace guide was created particularly to assist you learn how to depict a flower in simply 9 easy steps!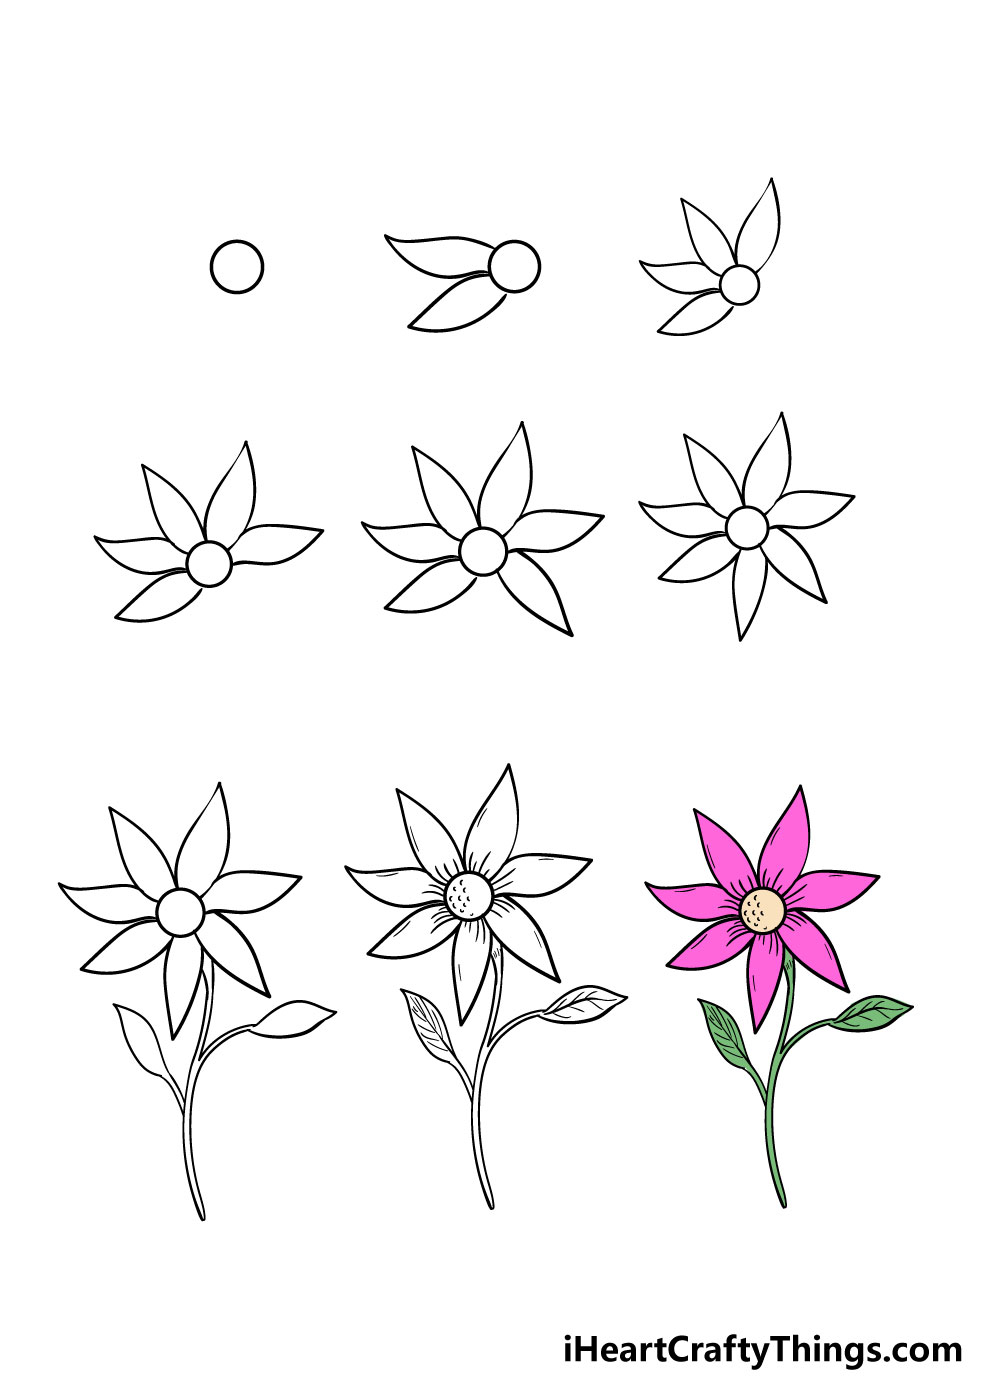
What's in this Weblog Post
- How to Draw a Flower – Let's get Started!
- Step i
- Step 2 – Draw in the outset ii petals
- Step 3 – Next, draw in 2 more petals
- Step 4 – At present draw in the adjacent petal
- Step 5 – Next y'all volition be adding another petal
- Step 6 – Add in the concluding petal
- Pace seven – Now draw in the stem and leaves
- Step 8 – Add together the final details
- Step 9 – Finish information technology off with some color
- Your Flower Cartoon is Consummate!
How to Draw a Flower – Permit's become Started!
Step 1
For your outset step in this guide on how to describe a flower, the get-go thing y'all need to practice is to describe in a minor circle.
If yous can freehand a near-perfect circumvolve that would work perfectly, but you tin also utilize a drawing compass for a perfect circle.
You could besides utilise something small and circular similar the cap of a thick pen to describe around if you don't accept a drawing compass.
For this footstep, y'all tin draw this circle with a pen or a dark pencil, as it will be in the concluding moving-picture show.
Pace 2 – Draw in the first 2 petals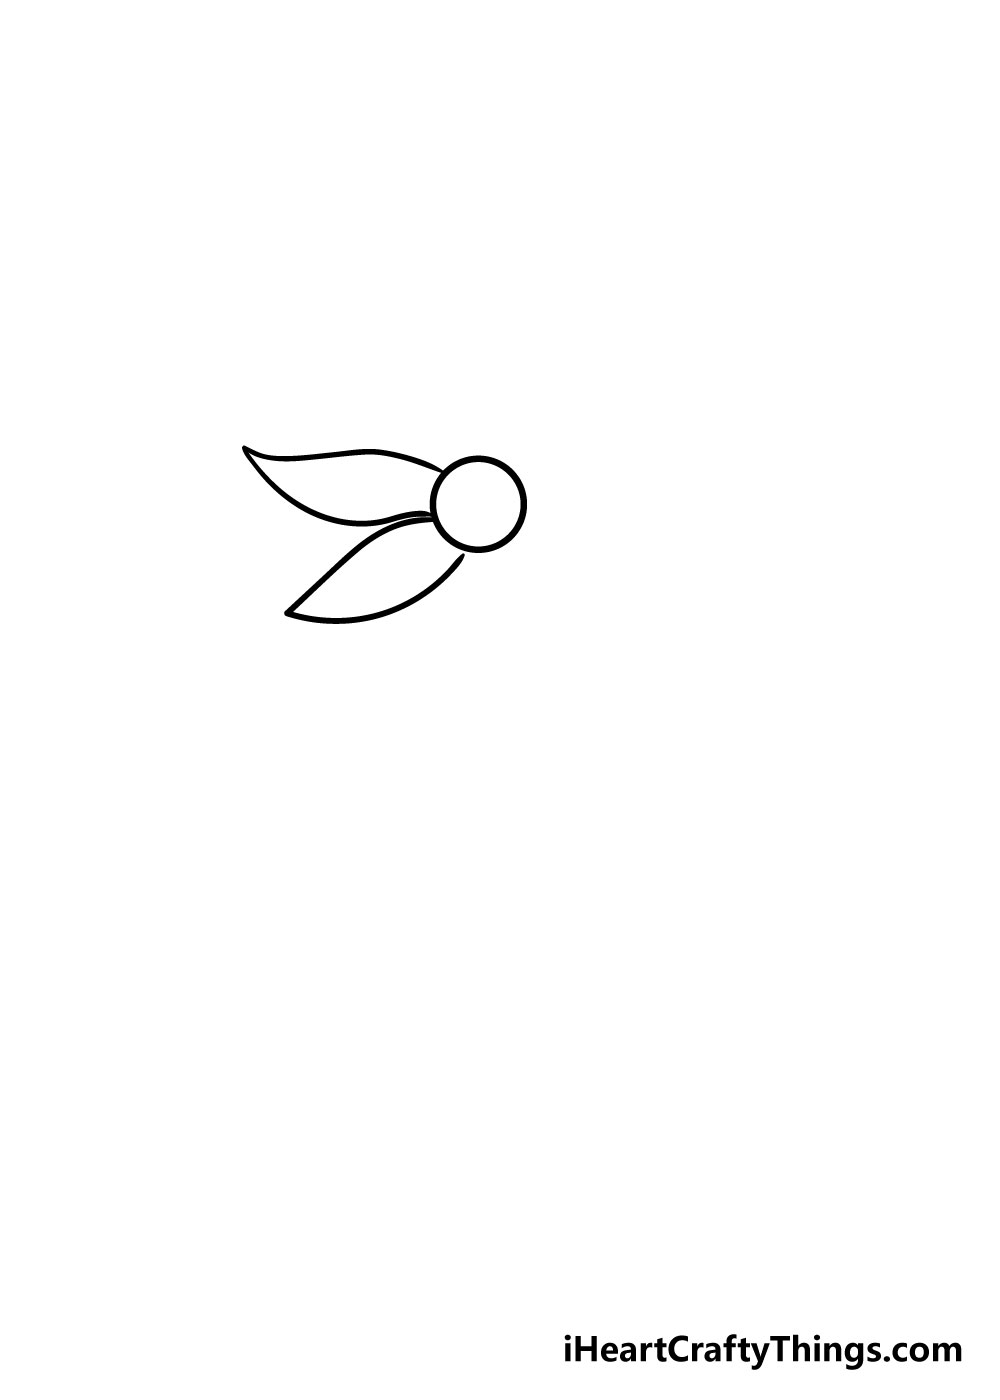
Now that you have the center of your bloom cartoon, it's fourth dimension to depict in the get-go petals! To exercise this, draw in two curvy lines that are thick at the lesser and meet at a thinner bespeak at the end.
For this step, try to depict in two petals equally shown in the reference image.
This can take a bit of do, then peradventure apply a lighter pencil to depict in these petals and and so go over them in pen or darker pencil one time y'all're happy with them.
Footstep iii – Adjacent, draw in ii more than petals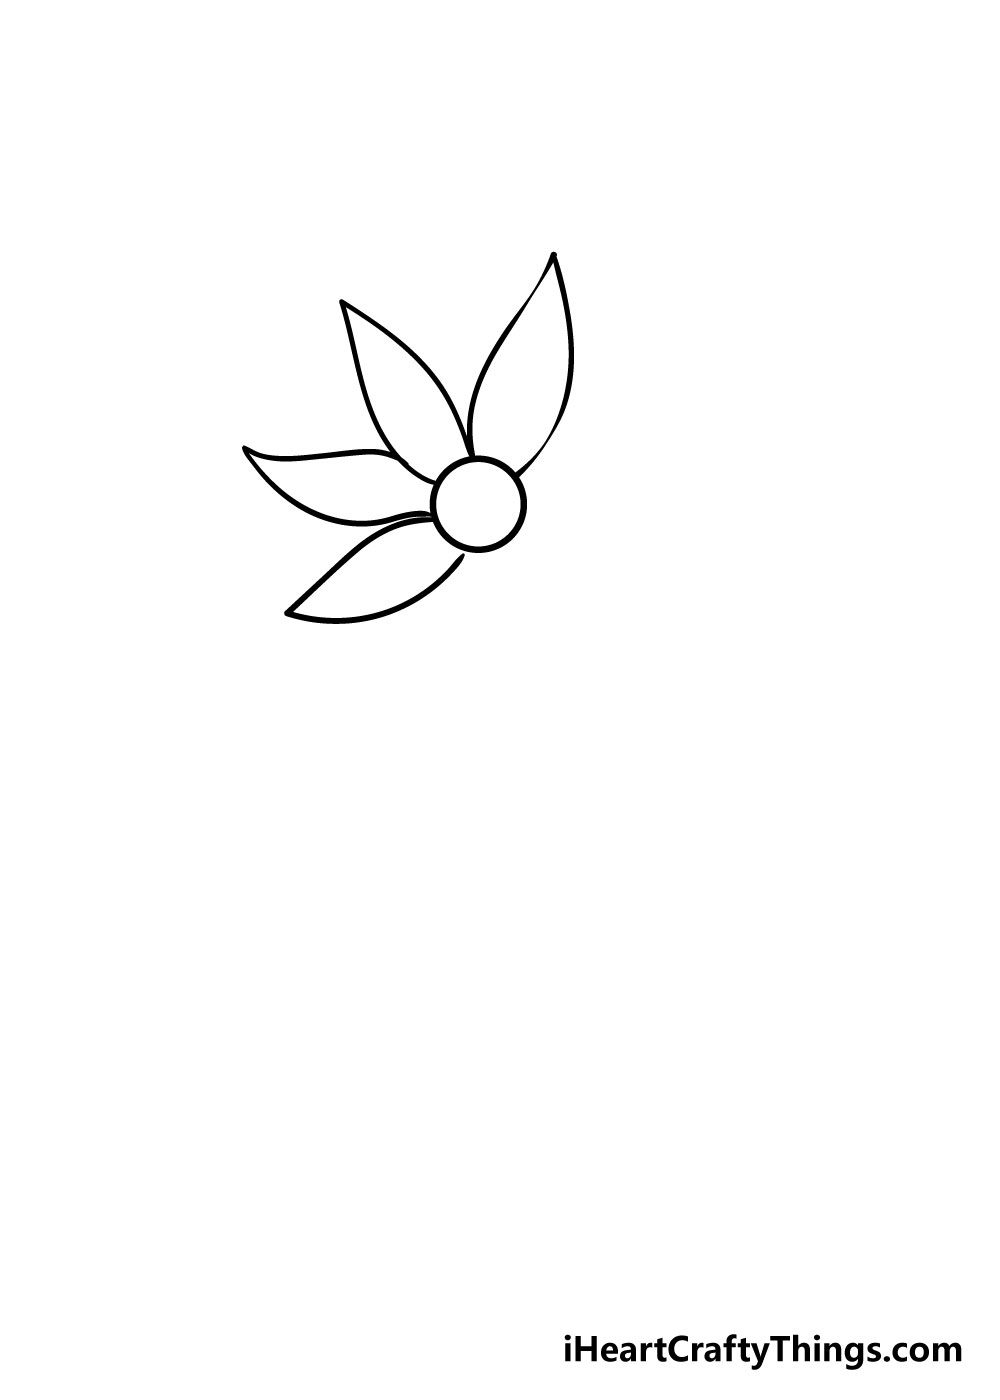
You've fatigued in your first two petals, and so now that you have the hang of that it's time to add together in the adjacent two.
For this step, but draw in two more than petals exactly equally you did before to the correct of the ones you have already.
Step 4 – Now draw in the side by side petal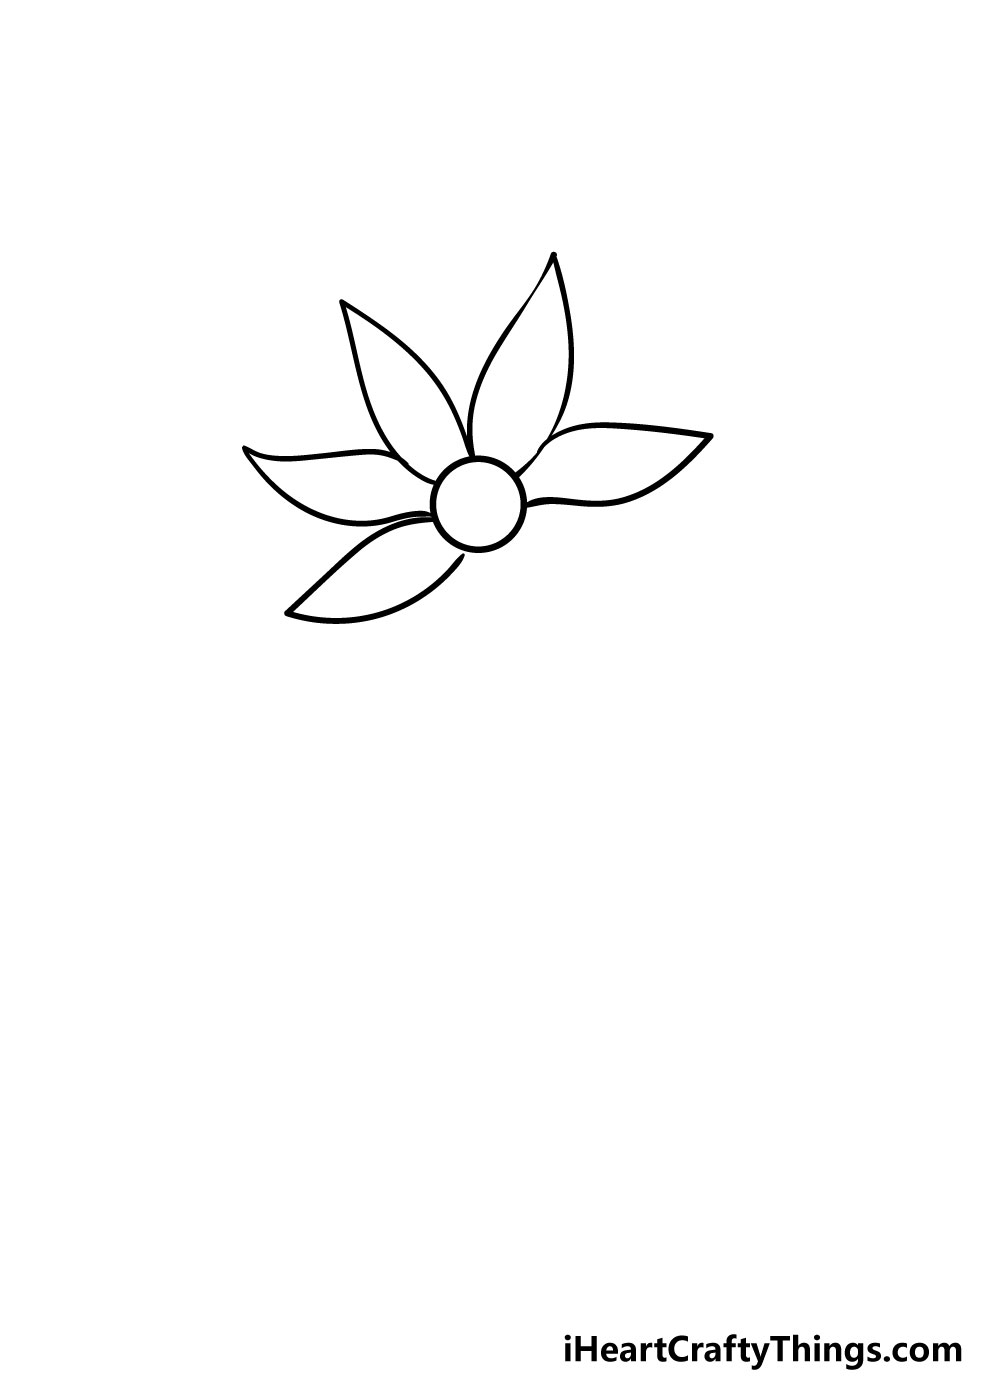
For step 4 of learning how to draw a blossom, you will be calculation in another petal at the top of the flower.
This petal will be a bit thinner and of a slightly different shape to the others though, so make sure to refer to the reference image if you're having a hard time with it.
Step 5 – Next you volition be adding another petal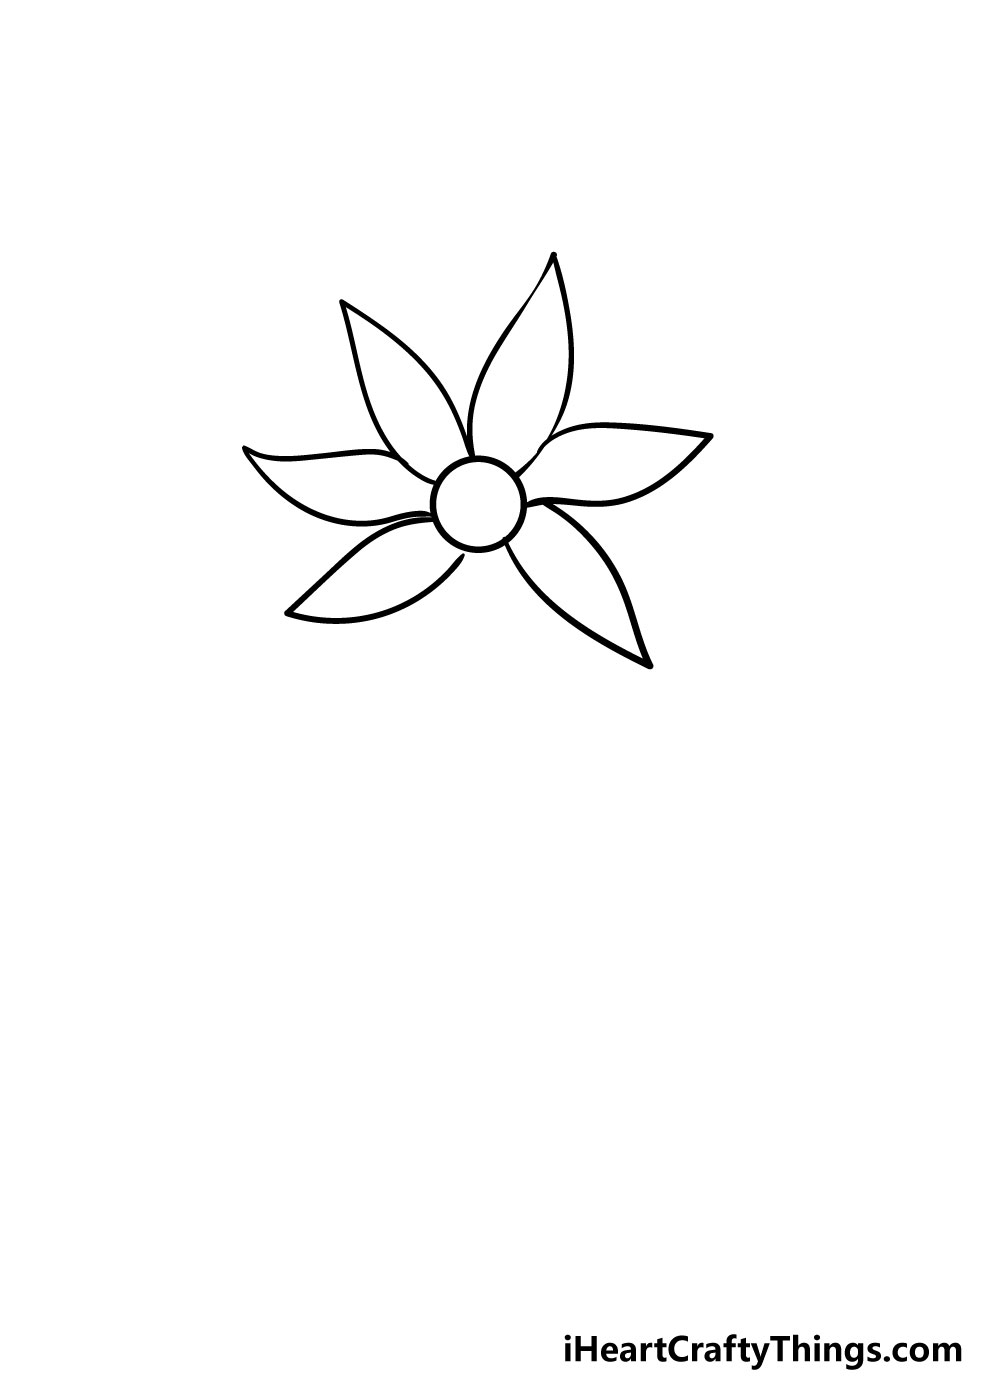
We will exist adding in one of the last petals onto your bloom drawing for step 5, so merely draw in 1 more petal as shown in the reference picture.
As you can see, your flower drawing is really starting to have shape!
Pace 6 – Add in the last petal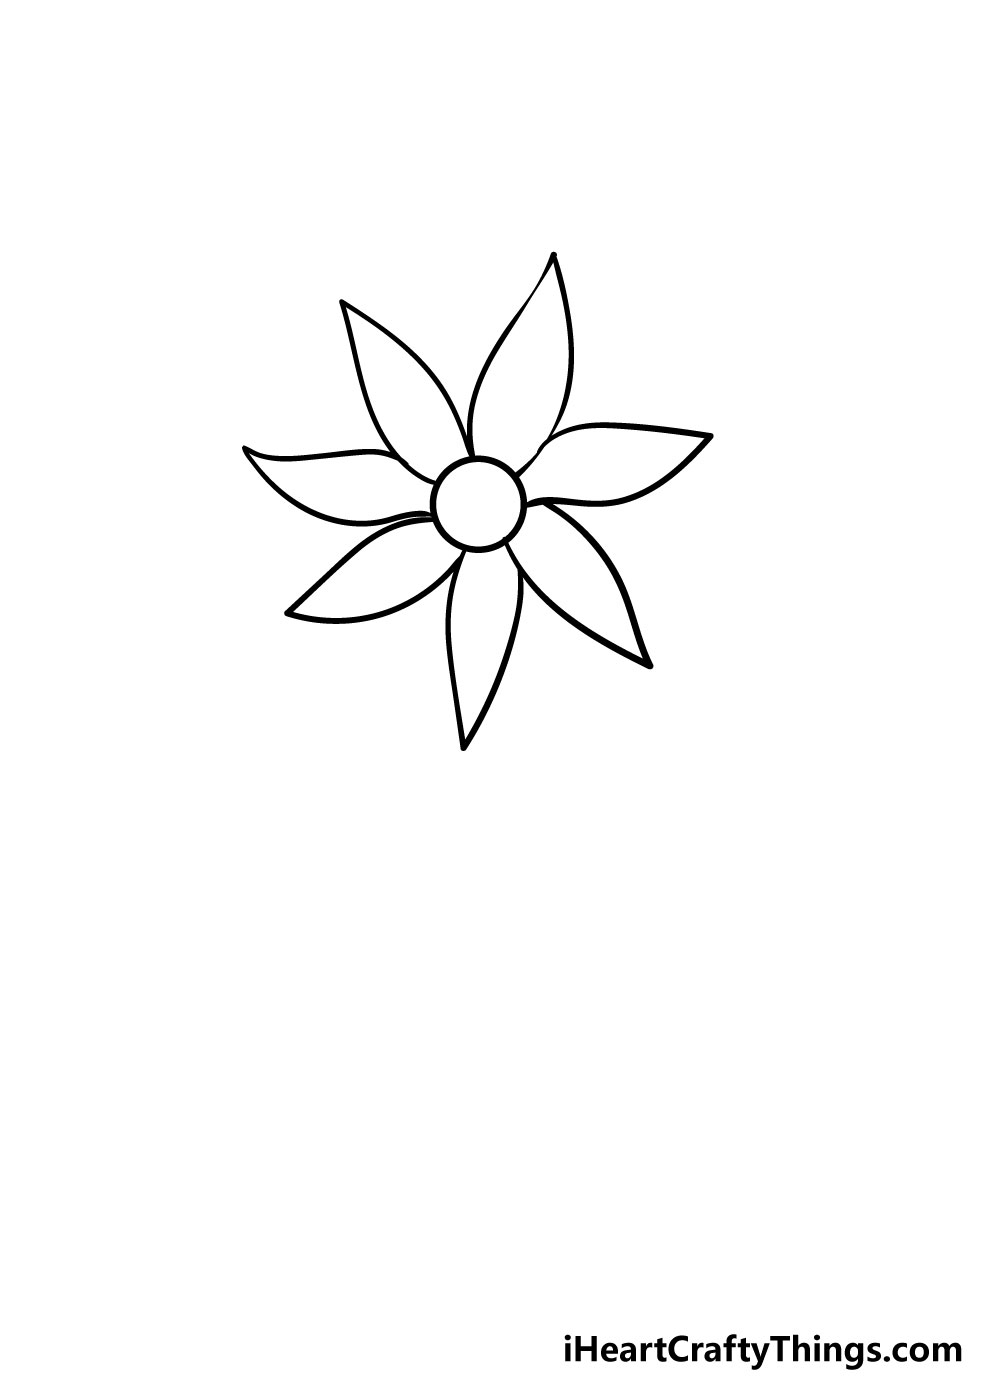
You've most finished the master function of your blossom drawing, so for this step you just need to add together in the final petal.
This ane should exist a little thinner and sharper every bit you lot can come across in the reference image. If you've followed the guide then the petals should by and large be of a like size with both length and width.
Footstep 7 – Now depict in the stem and leaves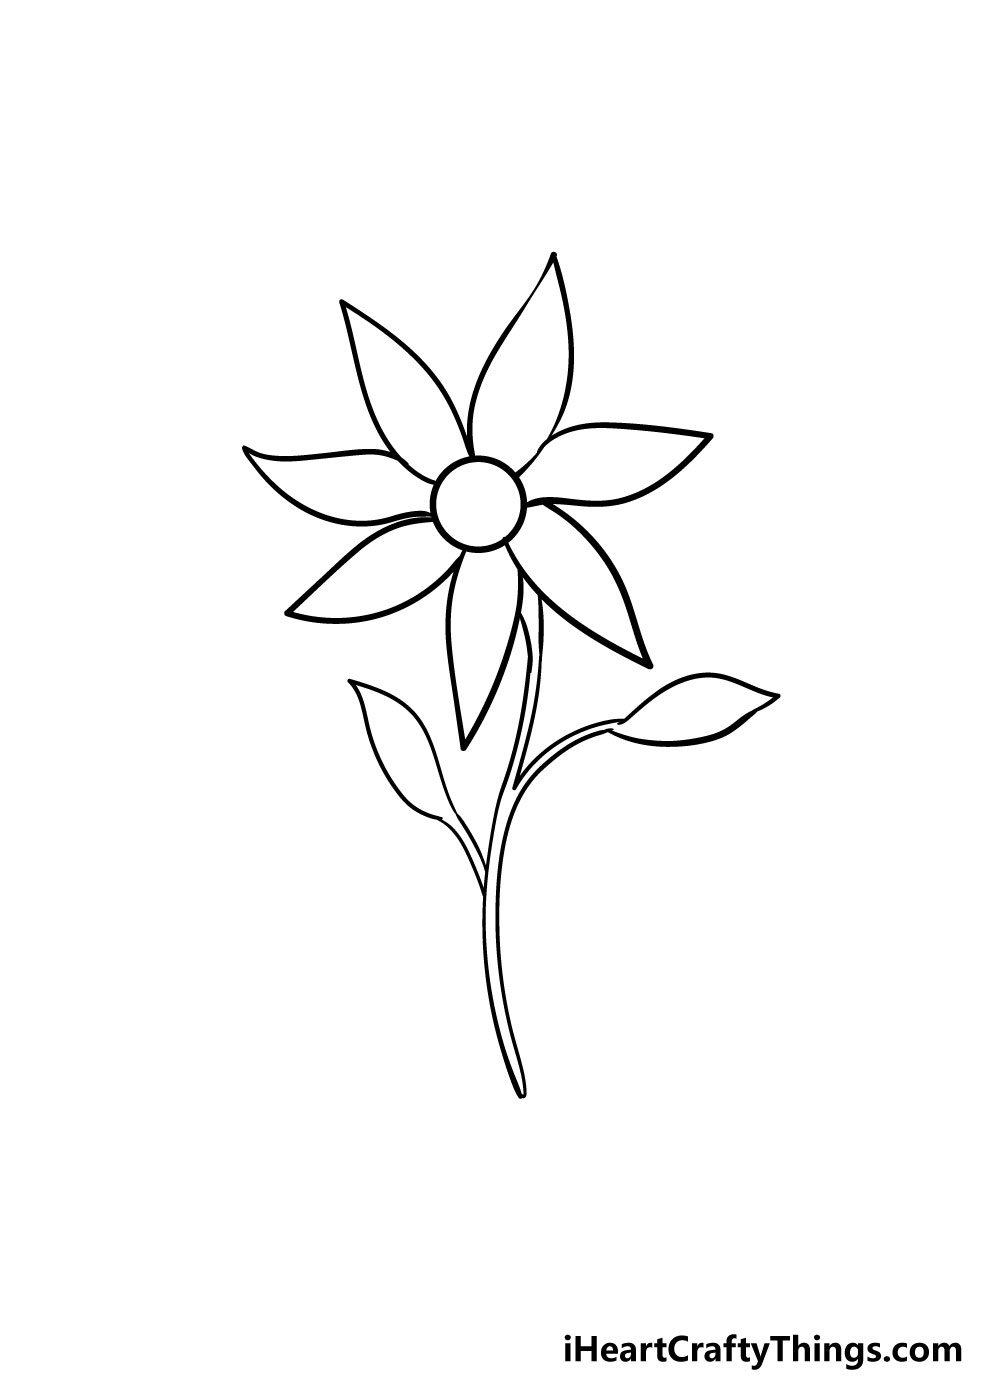
For this next step in learning how to describe a flower, at that place are some tricky aspects so the reference picture show will be very handy!
I would also recommend using a lighter pencil for this step before going over it in pen. To start with, depict 2 curvy lines extending from betwixt the two lowest petals as you can see in the prototype.
They should be very close to 1 some other and join at the finish.
Once you lot've done that, draw in one of the leaves by drawing ii curved lines coming off the stem and so meeting in a foliage shape.
The reference moving picture should prove very useful for this! One time you take that drawn in, simply draw in another leaf on the other side.
Step eight – Add the concluding details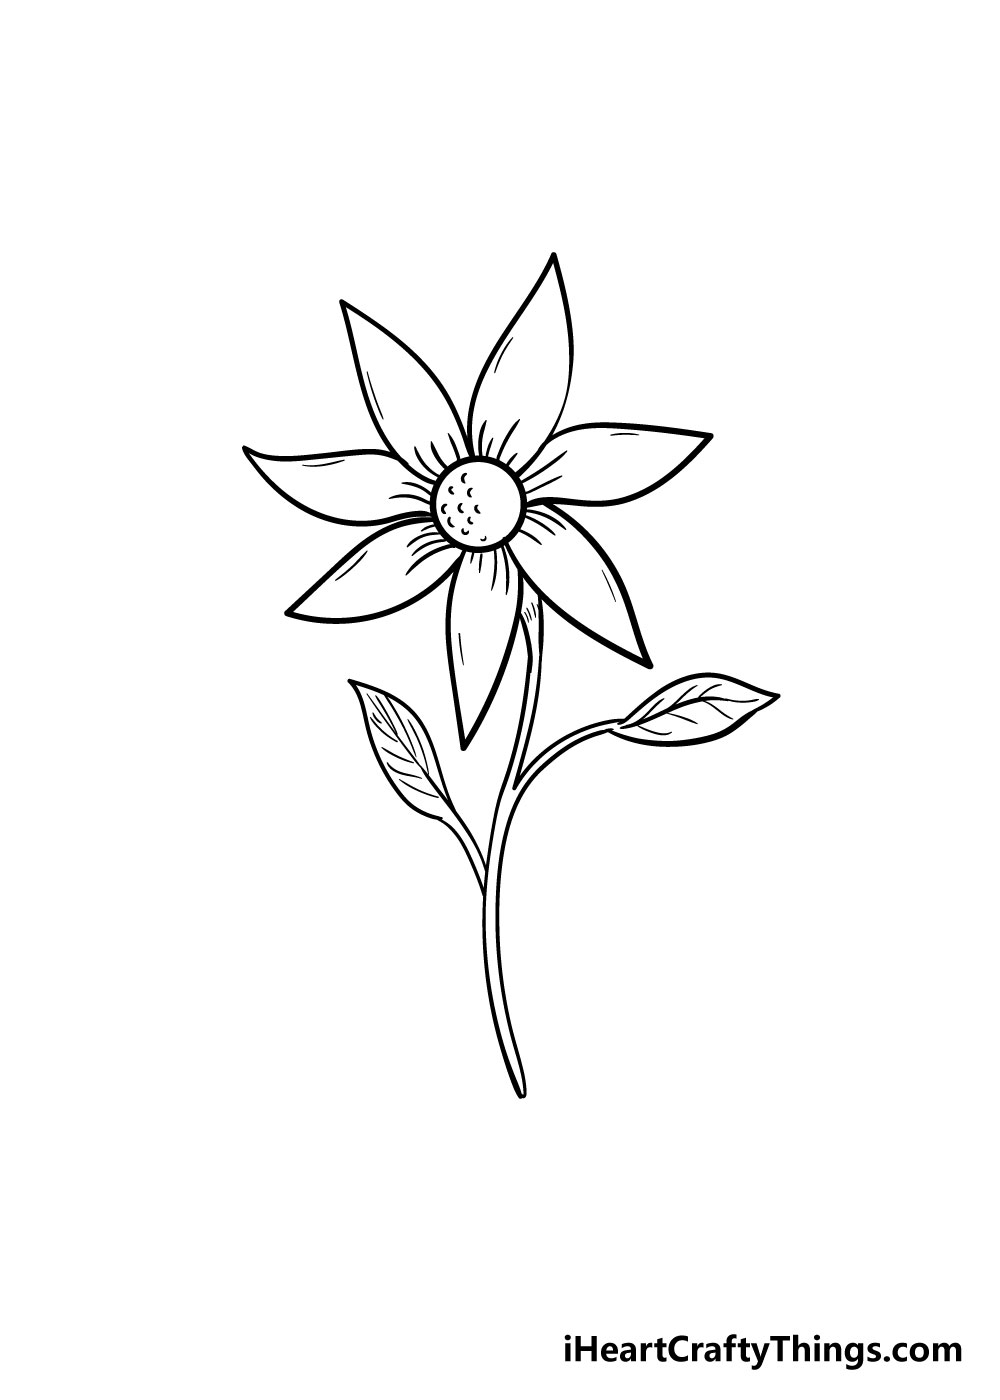
Your flower drawing is almost consummate! For this footstep, we will exist adding in some details to your flower drawing.
To start with, you lot tin can draw in the veins of the leaves using some thin lines. You tin refer to the reference image to get an thought of how these veins should look!
You lot can then add in some lines in the petals extending from the center of the flower to make the petals wait wavier.
Lastly, y'all can add in some modest curved lines to the center of the flower to give it a more than textured look. In that location are more pocket-sized lines you can add likewise for some actress little details.
Step 9 – Finish it off with some color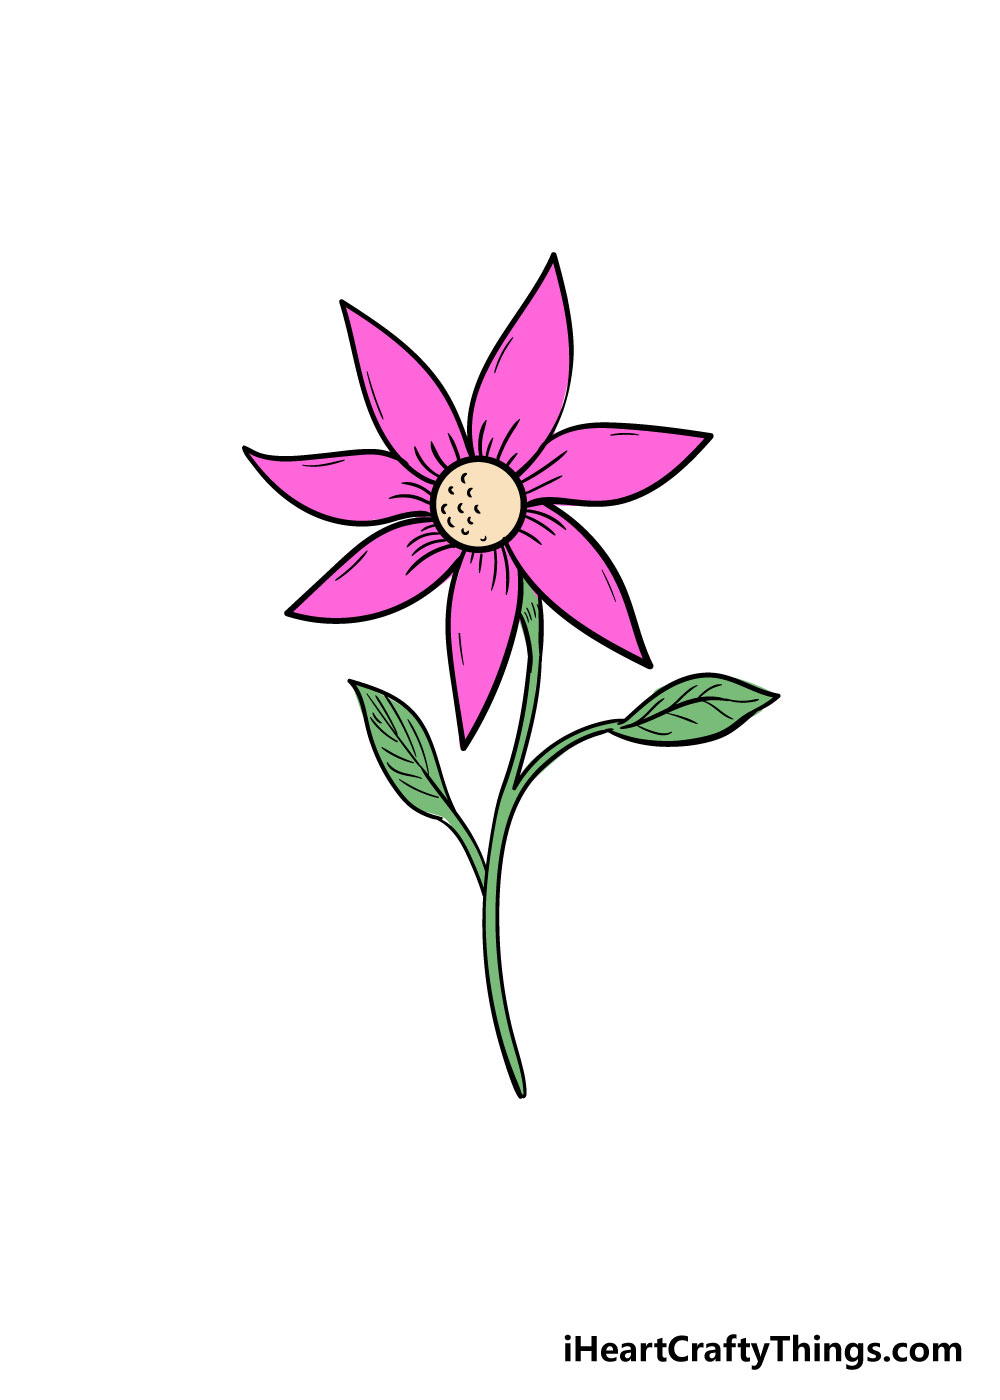
Now that you've completed your beautiful flower drawing, at that place'south just one affair it needs: some cute colors!
This is a step where you lot should let your imagination and creativity run wild.
We take an example of how you lot could colour it in, but yous should employ whatsoever colors you love to really bring your blossom drawing to life!
You could likewise experiment with different art mediums such every bit paints, watercolors, colored pens and pencils for different stunning colour looks.
Your Bloom Drawing is Complete!
We hope that you lot had a great fourth dimension using our footstep-past-step guide to larn how to describe a bloom!
As with any drawing project, it tin be challenging to get right but is e'er made much easier when you suspension information technology down into steps.
Nosotros're certain that using this guide you will master it in no fourth dimension!
Once you've gotten the hang of it, you could experiment with drawing different flowers using this guide as a starting point. If you do this, it could actually help to use photos of your favorite flowers to help you.
We likewise tin't wait to see what beautiful colors y'all use for your flower drawing! In one case y'all've completed your artwork, we hope that you volition share information technology to our Facebook and Pinterest pages for u.s. to relish!
Nosotros e'er honey your brilliant artworks and we can't wait to see some colorful and stunning flower drawings from you lot!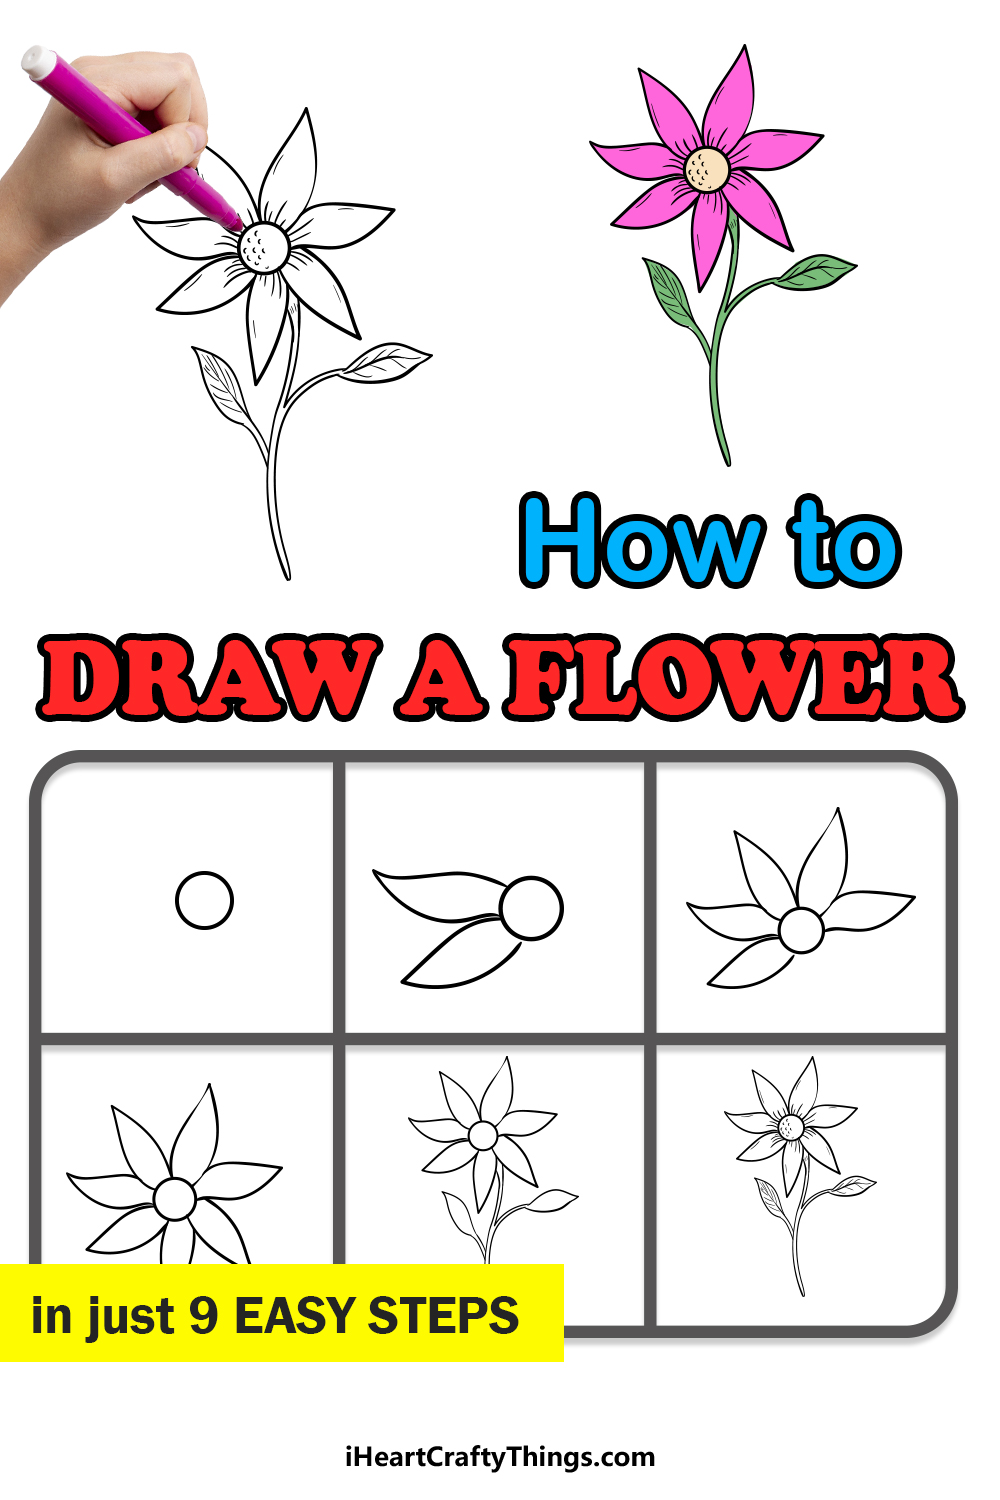

Source: https://iheartcraftythings.com/flower-drawing.html
Posted by: williamsforem1954.blogspot.com
0 Response to "how to draw a flower step by step"
Post a Comment